
How bass works ~ fundamental bassology
Music is usually broken down into melody, rhythm and harmony. But what about the very lowest notes in music, that can have an impact on all three? In this film Howard looks at the abiding fascination musicians and composers have had with the bass.
For half a millennium instrument makers have been trying to construct instruments of all shapes and sizes capable of thudding, sonorous low notes. Only with the arrival of the synthesizer did they succeed in producing a rival to the mighty organ. With disco, dance, and drum ‘n’ bass, the bass has arrived centre stage.
But bass notes have another, crucial role. Far from just plodding away in the background, bass lines can have a critical effect on the whole structure of a piece of music, helping to drive the chord progressions.
Howard looks at the dark horse of the musical family, and its use in the hands of such diverse musical talents as Johann (and Richard) Strauss, John Philip Sousa, Stevie Wonder, Elton John, Albinoni, Bach and Motown’s resident bass maestro, James Jamerson.
Part 2
Subtractor LFOs and Mods
More in-depth tutorials coming your way from the Propellerhead studio
After watching the first two Synth School videos you’ve probably realized that the entirety of synthesizer sound design is simply about taking a basic sound wave and reshaping it with basic tools like filters, amp envelopes, phase, other oscillators mixed in, etc. This week we’ll look at the final piece of the SubTractor puzzle: LFOs and Performance Modifiers. When you’re done this video you will have everything you need to start creating some seriously unique SubTractor patches. More importantly, you’ll be ready to tackle the more complicated Malström Graintable synthesizer.
Next week I think you’ll be surprised with how much you already know about it having built a strong foundation in a fundamental synth like SubTractor.
MultiFreek 2.4 by UFO Scientific
MultiFreek 2.4 is a VST multichannel spectrum analyzer.
MultiFreek is a multitrack frequency analyzer for VST platform (Cubase, Sonar, or any other VST host can work with it), focused on the task of simultaneous monitoring of frequency distributions of several tracks. Its visual feedback lets you (in addition to hearing) clearly see and analyze your frequency problems and how your processing affects the mix, doing this track by track in your VST host, in a single-windowed graphical interface equipped with specialized features to save your effort and boost your inspiration. Multifreek is equipped with two frequency analysis engines: precise and efficient.
Features
MultiFreek is a VST plug-in providing you with handy way to monitor spectral picture of up to 7 different audio tracks simultaneously in a single window. Being a multichannel spectral analyzer, it not only shows smooth graphs for each track separately, but also allows you to:
- assign different colors to them;
- put arbitrary text captions;
- rearrange graphs as you want;
- Freeze graphs at any moment to get an instant snaphot of your frequency picture;
- Enable graph smoothing for easier visual analysis when necessary;
- See the spectrum on controllable level of detalization (overall picture or specific frequency range);
- Enlarge or reduce spectrums in order to fit them into size comfortable for monitoring. Doing this either “globally” – for all sources at one mouse move, or “locally” – for each source individually.
- choose between two different analysis modes:
- efficient mode which allows to maintain high bass precision while being very CPU friendly.
- precise mode which uses traditional Fourier transform and gives exact frequency picture of signal in expense of higher CPU load.
Get the grips with KORG Kaoss Pad
Korg has released a batch of high quality tutorials for the Kaoss pad
Create your own KAOSS combinations with the Kaoss Pad Quad! Four processors under one pad; each processor has five options (plus off) — that’s 1,295 combinations. Each processor also has an independent Freeze control. This video shows an overview of the product.
This video shows off some of the effects in the Korg Kaoss Pad Quad. Like all Kaoss products, the X-Y touchpad is used to control multiple effect parameters in real time. The Kaoss Pad Quad takes this idea even further, offering four effect processors, all controlled from a single touchpad.
The Kaoss Pad Quad features four independent effect processors. Each processor has its own “Freeze” button to hold the parameter settings while continuing to control the parameters of the other processors. This is a very fun and cool feature, and this video demo shows it in action!
In addition to all the cool effects, the Kaoss Pad Quad also performs Looper, Reverse Looper, and Loop Slicer operations. This video demo shows how to use these Loop tools in combination with the other effects. Very slick!
The Kaoss Pad Quad can quickly integrate into any DJ setup. There are Vinyl Break and Scratch effects, as well as a ducking compressor that can really move the show along. Everything is selected in real time from the front panel, making the Kaoss Pad Quad ideal for live performances!
Voyager Controller Techniques
Minimoog Voyager XL MIDI & CV Controller Features
A quick look at a few of the many MIDI and CV control capabilities of the Minimoog Voyager XL. An XL prototype, Slim Phatty prototype, Moog Voyager, Moogerfoogers, Korg MicroX, Yamaha MU80 and more are used to test some of the XL’s more advanced functions.
Reason tutorials: Subtractor Filters and Envelopes
In the second installment of my “Synth School” series I’ll be staying on the Subtractor synth but looking at the Filter sections, Amp Envelope, Filter Envelope, and Mod Envelope sections. The masters of synth production are masters of these tools. Something as simple as a Low Pass filter when paired with the right chord progression can lift the entire club crowd into a frenzy. The proper Amp Envelope can bring out the vibe in your song. These are powerful tools to conveying and even evoking strong emotion from what sometimes are rather sterile starting melodies or chords.
As always, I encourage you to play around with them on your own to get a feel for how they behave and interact with each other but today I’ll walk you through each slider and button and show you a little of my own experimentation.
In-depth on the Reason Combinator
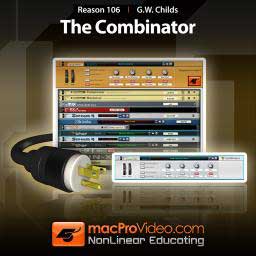
macProVideo.com has released a new video tutorial on Reason’s Combinator Here’s what they have to say about it…
In this tutorial, G.W. Childs, one of the original Combinator sound designers for Reason 3 and Reason 4 will give you step by step examples detailing the “ins and outs” of the Combinator, while showing you how to create powerful, new Combinators using hot new instruments like Kong.
You’ll get in-depth examples of how to design your own elaborate and powerful instruments by combining instruments and FX together. Additionally, you’ll learn how to create your own FX presets by combining loads of different FX devices. You’ll even get cool examples in how to remix your own tracks using the Combinator!
This course also includes an exclusive Refill collection designed by G.W. exclusively for this course. You can use its presets to follow along, or just use the performance Combinators, drum Combinators, and FX Combinators for your own musical creations.
Pricing and Availability:
From $25.
More information:
ES2 Synthesis Introduction
Via soundsLogical
Synth School with the Subtractor
As electronic music producers, we rely on synths as our bread and butter sounds for leads, bass lines, effects, textures, and so on. Knowing that, how crazy is it that so many of us don’t REALLY know how to use them?! I mean, it’s not our fault in some ways. The presets we get from the factory soundbank and ReFills are very good. Usually one of those with a couple random knob adjustments get us off and going just fine.
But imagine the power you’d have if you could sculpt a sound and control a sound with precise knowledge of what you’re doing and the effect it will have. Imagine if you had your own folder of custom patches that you created; your own stash of secret sauce that nobody else has. Imagine if you could think of a sound you’d like to create and to know instantly how to do it.
I’m going to embark on a multi-week exploration of synthesis theory to do just that for you. This week we’re starting with the most basic synth there is – the Subtractor. But don’t let its simplicity fool you. It’s capable of some amazing sounds.
Ableton Live Tutorial: Dubstep Talking Wobble Bass w/ Operator
Ableton Certified Trainer and Dubspot Instructor Michael Hatsis aka !banginclude explains how to make ‘dubstep talking wobble bass’ in Ableton Live using Operator (If you don’t already own Operator, check out the tutorial video Dubstep Wobble Bass Part 1 in which Hatsis used the sampler to create the mid-range bass sound and load up that preset.) Starting with the Operator sound he created in the previous video tutorial Dubstep Wobble Bass Part 2, and using the patch as a launching point, he turns off Operators B, C, and D and keeps Operator A on a square-wave, sets the LFO rate to a 1/2 a bar, and switch up the Filter resonance to 5, which gives us a somewhat mild whomp bass sound. To add the talking effect, Hatsis used Ableton Live device Redux effect to bring the sample-rate down a few levels, set the Downsample to Hard, somewhere between 15 to 24 to get the talking sound. As the LFO sweeps through the Filter’s frequency, the Redux adds a vocal effect to the wobble, and as you increase the value of the Downsample, the deeper and heavier the voice gets; as you decrease, the voice gets lighter. The technique known as “digital downsampling.” Hatsis returns Operator to add a little FM/make the sound grittier by turning on Operator B. Be aware of the odd effects, as the Redux plugin enhances the grittiness of the FM. Furthermore, Hatsis demonstrates other effects within Operator including Coarse value, LFO rate, and Filter settings and options, frequencies, resonance, and recaps the steps and methods at the end.
DATAMASKIN

