
Geo Synthesizer Tutorial by Rudess
The Geo Synthesizer was recently released on the App store and in this video Jordan Rudess takes you through the basics:
In this first Geo Tutorial, I show how you can quickly and easily sample something in SampleWiz and move it to Geo Synthesizer! Here is the direct link. http://itunes.apple.com/us/app/geo-synthesizer/id465224352?mt=8&uo=4
About the synth:
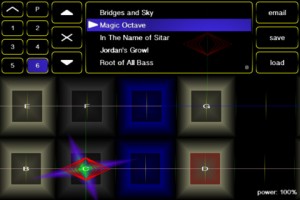
Geo Synthesizer is a musical instrument and MIDI controller. A collaboration of Wizdom Music’s Jordan Rudess and Kevin Chartier (MorphWiz, SampleWiz) and Rob Fielding (Mugician), Geo Synthesizer is an incredibly expressive musical instrument specifically created for a multitouch surface.
A comprehensive Geo Synthesizer manual is available at: http://www.wizdommusic.com/GeoSynth/manual.html
Jordan says: “Since touching a preliminary piano keyboard on an iPhone screen and realizing the amazing potential for musical expression on a multitouch device, I have been inspired to create next-generation musical instruments for iOS. Geo Synthesizer is a dream come true in many ways. It is the fastest truly playable iOS instrument that I have put my hands on to date. I can fly through the range of an instrument while expanding on the kind of advanced pitch control we introduced in MorphWiz. As someone who grew up with synthesizers, I can tell you that pitch bending has never been this good!
“Geo features many of my custom sounds and in addition, Geo is also a MIDI controller, so you can use it with any external midi instrument or virtual MIDI. Virtual MIDI allows you to control an app running in the background on the same device! A great feature of Geo is that internally and externally we send independent voices on each note played, so as an example, you can pitch bend one note and not the other, or add unique expression on every note! I can’t wait to see the YouTube videos of all of you guys rocking out with Geo Synthesizer!!!”
Features:
– ability to load waveforms from SampleWiz presets
– octave rounding for effortless soloing over large ranges
– whammy slider with absolute and relative modes
– 12ET, 24ET, 53ET, and 665ET temperament options
– mono, string, and full-polyphony modes
– tuning and transposition controls
– snap speed control to affect how quickly the instrument pulls notes in tune
– playing surface options for number of rows and columns on screen
– octave and fifth harmonics synthesis options to rich, organ-like sounds
– gain control to add distortion to the sound
– FM and touch FM controls for timbal variation
– mono out for use with guitar amps
– sine, sawtooth, square, and custom (SampleWiz) wave options
– attack and release controls
– synthesis body control
– lowpass filter with resonance
– stereo delay
– reverb
– MIDI output with polyphonic note bending and multiple configuration options to allow compatibility with a wide range of hardware and software synthesizers
– performance menu lets you make your own custom menu so all the controls you need are always right at your fingertips
– 40 presets carefully selected by Jordan Rudess, including patches from Jordan’s personal sound library
Reason 6 – Getting up to Speed
ASK Video has released Reason 6 Getting up to Speed, a new video tutorial covering the new features and effects in Propellerhead’s Reason 6 music software.
https://askvideo.com/product_info.php?&products_id=331
Reason and Record have been combined into one feature packed product aptly titled, Reason 6. There are lots of new features and effects and we want to get you up to speed! The aim of this tutorial is to help those of you who are already using Reason or who already have our Reason 5 to tutorial, to get up and running quickly with the new elements Propellerhead has added.
We won’t simply be glossing over these features however, we want you to know them just as well as you would after watching one of our full length tutorials. We cover 5 main topics: The new Mixer, The Pulveriser, Alligator, The Echo, and Neptune. By the time you’re done watching you should feel confident in using them in your next project.
If you’re on old Reason veteran or you already have some of our older Reason tutorials, picking this up is a no-brainer because it avoids talking about stuff you already know and gets right to the stuff you need to know. The easy-going and fun style of the tutorial will also make learning about the new features in Reason 6 a really great experience.
Ableton Live tutorial on auto filters
In this Ableton Live tutorial, Professor Nalepa from Dubspot shares a tip he learned from Justin Boreta of The Glitch Mob at the Dubspot Ableton Live 8 Tour workshop in Los Angeles. The technique involves creative use of the Auto Filter, Audio Effects Rack, The Chain Select Ruler and the Macro Knobs.
Placing Autofilter In An Audio Effects Rack For Increased Control
NLogSynth PRO & FL Studio HD Tutorial
NLogSynth PRO & MIDI available from App Store or visit website www.temporubato.com

Most versatile iOS synth with professional grade virtual analogue low latency sound engine:
– Play it from on-screen keyboard
– Use MIDI keyboards & controllers via MIDI interfaces
– Connect to your digital audio workstation via MIDI interfaces
– Play NLogSynth from other iOS apps like SoundPrism PRO, polychord or Genome Sequencer via virtual Core MIDI
– Synchronize via Korg’s WIST to other iOS devices running iElectribe, iMS20 or other WIST compatible apps
– Synchronize NLog to beat-oriented apps like MoDrum, Molten or Funkbox running on same device via virtual Core MIDI
– Share patches with NLog Audio Unit Mac version
– Make audio or MIDI recordings on the run and share your files
– Export patches & recordings to iTunes, SoundCloud, Email, WiFi, Beatmaker & Sonoma AudioCopy pasteboards
How to make a Hihat via re-sampling
Nanoloop comes without sample-kits or pre-set instruments, you have to build all sounds from scratch. This little tutorial shows how to create a hihat-like sound by re-sampling the internal synth.
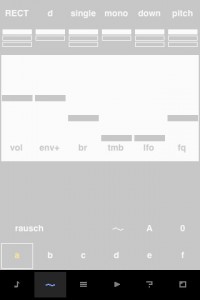
iPhone application:
Nanoloop for iPhone combines sequencer, synthesizer and sampler in one package. It provides all functions for creating electronic music from scratch.
Features:
– Straight, minimalistic graphical interface
– Pattern-based stepsequencer
– 6 channels, each can be synth or sampler
– Song editor with loop function
– Synth with envelope, filter, lfo etc
– Sample on the fly
– Re-sampling
– Save function
– Sample-import via e-mail
– Copy & paste of samples
– File management via iTunes
– WAV-export
– Export to clipboard
– Send and receive projects via e-mail
Six example projects are included.
Sequencer
Built from ground up and specifically optimised for touchscreens, nanoloop’s stepsequencer is very fast and simple to use.
Synth
The simple but powerful synthesizer allows to create a great bandwidth of sounds, including beats, noises, basses and pads. Available synthesis types are:
– rectangular wave with filter
– FM
– LFSR noise generator
Each synth channel is two-voice polyphonic and an additional stereo effect can be applied.
Sampler
Short samples can not just be used in a drum-machine style, but also be pitched and played as notes.
Samples can be recorded via microphone (iPhone only), headset microphone (iPhone, iPod touch 2nd gen only) and from nanoloop’s own sound output.
Using Multi Cues & Loops – Tutorial
http://youtu.be/ktADwlMuDnU
Here’s a brand new tutorial from MixrDJ – Learn how to master the multi cues to quickly produce loops, cuts and remixes with muscle memory exercises and technique. Mixr features 4 hot cues that allow you to instantly go back to a specific point in time. You can tap on multi cue/loop button to activate the panel. To set a cue, simply tap on the “set” button, or the “in” buttons in the multi cue panel to set your markers. Each marker is color coded to help differentiate the multi cues.
You can set up to 3 manual loops by setting “out” points and enabling the “loop” function. You can clear out the in and out points by tapping on the “in” and “out” buttons. Each multi cue is saved and can be used when you reload your tracks. Each deck can save a different set of multi cues per song allowing you to customize your cue sets. Alright, and thats how to use multi cues and loops. Remember, each deck can save a new set of multi cues per song. Don’t forget to follow us on twitter, Facebook and subscribe on youtube, we’ll see you guys in the next video.
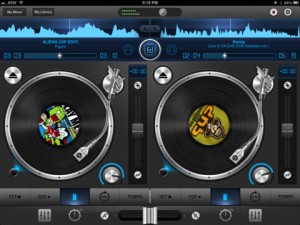
Mixr delivers a rich feature set designed for mobile DJ’s. You can pitch, tap to tempo, scratch, multi-cue and mix with precision. You can manage your iPod library with the revolutionary Crate Manager. Make crates with the touch of your finger in the drag-n-drop interface, you have complete control over your mixes. Featuring high quality DSP effects, you can add Delay and Reverb to your mixes to add that extra punch to your sets. Supporting mono split audio output, you can monitor pre-cueing with your headphones for live performances. Record your mixes and play them back in a sleek player. Recording a mix automatically creates playlists! Turn your iPad into the best mobile DJ Turntable Studio, with Mixr.
Ableton Instrument and Preset Management Tutorial
AfroDJMac Free Weekly Ableton Live Racks #31: Space Heaven Pad and Drums. Enjoy the sounds of traveling through the cosmos and into the great beyond with this virtual instrument rack. Also included is a drum rack from the demonstration music. Enjoy them.
As a little added tip, I show how I organize my personal presets to make them super easy to locate. I hope you find that useful, it’s made my life way better.
Download @: http://bit.ly/freesynth31
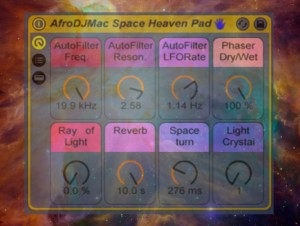
After digging around in my folder of Ableton presets (I keep a separate folder for all my own personally created presets, more on that later in this post), I came across this little gem, made probably over a year ago. It is made with a few layered synths, each one made of different sampled sounds. In all honesty, I’m not really sure where I got these samples from; whether I downloaded them somewhere, got them from a friend, or made them myself remains a mystery, but the sounds this synth produces is nothing less than heavenly. To me it sounds like being beamed up into the universe and flying through the celestial plains, on my way to heaven. At least, this is what I imagine it would sound like. Check it out and have fun on your intergalactic journeys. Oh, and as a little bonus, I’ve included a drum rack of some interesting sounds I’ve processed. So, for this installment of Free Weekly Ableton Live Racks, you get two racks for the price of none!
As I said before, I like to keep my own personal presets in a separate folder. As my collection of sounds grew, I got tired of sifting around through different folders for each instrument I made a preset for. My solution: create a folder of my own that I save my presets to. After I save a preset, I simply drag it into my presets folder. The benefit is that all my presets are in one folder, rather than scattered across my stock Ableton presets. This has saved me hours of searching around for my own unique sounds. In the video, I detail exactly how I do it, as well as give you a taste of the AfroDJMac Space Heaven Rack.
Chip tune tutorial – I FIght Dragons Series
Many of you have asked how we do what we do, so now we’re starting a series to explain the inner workings of our tech for those of you who wish to make chiptune and/or program controllers too!
Forthcoming Tutorials:
-Little Sound DJ (gameboy) programming
-MidiNES (nintendo) programming and usage
-rarer chips programming and usage (Commodore 64, Atari 2600)
-Chipsounds (plugin) programming and usage
-How to hook up videogame controllers as music controllers
-Recording and Mixing with Bill and Stanley
And possibly more! We’ll try to do one every week or two from here on out!
How to Make Daft Punks Infamous ‘Da Funk’ Synth Sound
“Da Funk” was initially released as a 12 inch single in 1995 under the Soma Quality Recordings label with the B-side “Rollin’ & Scratchin'” and again in late 1996 after the band signed with Virgin Records with the B-side “Musique”, a track that later appeared in the album Musique Vol. 1 1993-2005. In an interview with Fredrik Strage for swedish magazine Pop #23 Bangalter reveal that “Da Funk” was made after listening to Westcoast G-Funk for weeks.
“It was around the time Warren G.’s “Regulate” was released and we wanted to make some sort of gangsta-rap and tried to murk our sounds as much as possible. However no one has ever compared it to hip-hop. We’ve heard that the drums sounds like Queen and The Clash, the melody is reminiscent of Giorgio Moroder, and the synthesizers sound like electro and thousand of other comparisons. No one agree with us that it sounds like hip-hop”
In September 2010 Pitchfork Media included the song at number 18 on their Top 200 Tracks of the 90s
Background information:
Buy my latest song here – http://www.beatport.com/track/vile-prankster-ryan-enzed-remix/2838739
Be sure to check out my music production forum – ryanenzed.com/forum
All I ask in return for all the free tutorials that I do for you guys is that you support /buy my new tracks when they come out on beatport – good deal right!? 😀
Modulating Apple Logic with MidiShaper
An introduction on how to use MidiShaper to modulate Apple Logic. See also http://www.cableguys.de/midi-shaper.html
MidiShaper brings Curve’s flexible yet powerful LFOs and envelopes to all your favorite synthesizers and effects.
Four LFOs and four envelope generators work together in a sophisticated modulations matrix that can be set up to output modulated pitch, modwheel, channel aftertouch or any MIDI control messages.
MidiShaper’s LFOs can run infinitely or be retriggered, synced to your host sequencer from a buzzy 1/128 to an expansive 32 bars, set to the played note, or run from 0.02 Hz up to the audible range and brain frequency. Like Curve, MidiShaper features completely editable waveforms for its LFOs.
If your plugin or host sequencer allows for MIDI control, you have a great tool at hand to create vivid, inspiring sounds and bring the flexibility of Curve to your favorite software plugins, hardware synthesizers, MIDI VJ tools, lighting consoles and 1980’s MIDI keyboards.
DATAMASKIN

